Digital Tips n Tricks

  • Home
  • Mobile Tricks
    • Internet
    • Market
    • Stock
  • SmartPhones
    • Dvd
    • Games
    • Software
      • Office
  • Parent Category
    • Child Category 1
      • Sub Child Category 1
      • Sub Child Category 2
      • Sub Child Category 3
    • Child Category 2
    • Child Category 3
    • Child Category 4
  • Featured
  • Health
    • Childcare
    • Doctors
  • Uncategorized
Showing posts with label Chrome. Show all posts

Saturday, August 12, 2017

How to Cast Your Windows or Android Display to a Windows 10 PC


Windows 10’s Anniversary Update brings an interesting new feature: Any PC can now function as a wireless receiver for Miracast, allowing you to view the display from another Windows PC, an Android smartphone or tablet, or a Windows phone.


How to Turn Your PC Into a Miracast Receiver


To turn your PC into a Miracast receiver, just open Windows 10’s Start menu and open the “Connect” app. If you don’t see this app, you need to upgrade to the Anniversary Update.
With the app open, you’ll see a message that your PC is now ready for you to connect wirelessly. That’s it. You don’t need to mess with any firewall or network server settings. Just open the app whenever you want to cast.
On most PCs, you’ll likely see a “This device might have trouble displaying your content because its hardware wasn’t specifically designed for wireless projection” message. The application will still work, but it would likely work better if the PC’s hardware and hardware drivers was specifically designed to function for wireless projection.


How to Cast From Another Windows 10 PC

To connect from another PC running Windows 10, head to Settings > Display on that PC and select “Connect to a wireless display”. This setting should be in the same place on a phone running Windows 10 Mobile.
The PC running the Connect app should appear in the list. Click or tap it to connect.
After it connects, you’ll see a few more settings. Enable “Allow input from a keyboard or mouse connected to this display” and the PC functioning as the receiver will be able to interact with the PC through the Connect app.
To change the project mode, select “Change projection mode”. By default, it functions in “duplicate” mode and duplicates the contents of your screen. You can instead choose to extend the screen and treat the remote display as a second monitor, or only use the second screen.
Whichever option you choose, you can enable full-screen mode by clicking the “full screen” button on the window title bar.

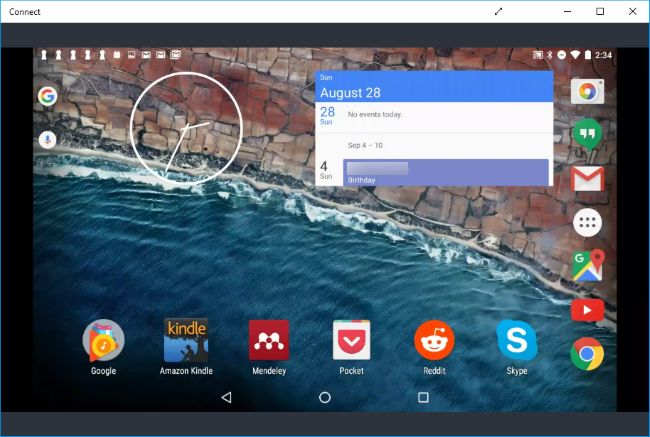
How to Cast From an Android Device


To connect from an Android device, you can use the built-in Cast feature…as long as your phone supports it. This is Android, so things aren’t always simple. Your manufacturer may or may not include Miracast support on your phone or tablet. In fact, even Google has removed Miracast support from its latest Nexus devices. But, if your device does support Miracast, this should work.
To cast on Android, head to Settings > Display > Cast. Tap the menu button and activate the “Enable wireless display” checkbox. You should see your PC appear in the list here if you have the Connect app open. Tap the PC in the display and it’ll instantly start projecting.
Don’t see the option here? Your phone or tablet’s manufacturer may have put it in a different place. Look up how to use Miracast on your specific device for more information.
The Settings app is considered “protected content” for security reasons, however, so you’ll have to leave the Settings app before your Android device’s screen will appear in the Connect app. You’ll just see a black screen into the Connect app until then.
The Connect app will produce notifications that you’ll find an the action center. For example, when we connected an Android device, we saw a message saying protected content can’t be displayed, and that we couldn’t use the mouse on our PC to control the Android device’s screen.
To stop projecting, just close the Connect window on the PC receiving the remote display or end the remote display connection on the device projecting to it

Read More
  • Share This:  
  •  Facebook
  •  Twitter
  •  Google+
  •  Stumble
  •  Digg

Saturday, September 20, 2014

How to Fake your Location in Google Chrome


Sometimes websites may request access to your location so that they can serve more relevant information. 
For instance, if you are looking for a Petrol Pump station, a maps website may use your current geographic location to display stations that are near your place.

Google Chrome will only share your location if you click Allow.

Fake your Geolocation Coordinates
When you visit a location-aware website, the browser will always ask for a confirmation before sharing your location. If you aren't keen to share your geographic coordinates, you can always deny that request or, if you are using Google Chrome, you can even send a fake location to the website.

Here’s how to do that. Press F12 (or Ctrl + Shift + I) in Google Chrome to open the Developer Tools. Click the Settings icon in the lower right corner and switch to the Overrides tab. Now you can specify the exact latitude and longitude coordinates* that you want to share with that website.


* You can use the Postal Address finder to know the latitude and location of a place.
Make sure that the “Override Geo location” setting is checked and then refresh the page to send that fake location. And this is obviously a useful feature for web developers who would like to test their geolocation-enabled apps from the same location.
Read More
  • Share This:  
  •  Facebook
  •  Twitter
  •  Google+
  •  Stumble
  •  Digg

Wednesday, September 10, 2014

How to Disable Ads from the Youtube Videos


Many Videos on YouTube run paid advertisement before and during the videos just to Moneterise and generate more revenue. Users can disable those ads from their videos but the one who is watching is not allowed by YouTube to do that.
But you can disable all the ads. Just follow the below 2 Methods of your choise to do this and enjoy ad free videos.


Method 1


1. Open the browser you use to surf internet.

2. Navigate to Extensions or Addons in your browser.

3. Search Adblock.

4. Add the Adblock Extension to the browser.

5. Now you can watch YouTube videos without the annoying ads. 


Method 2


1. Navigate to any YouTube video of your choise.

2. Open the developer console in your browser. Use the below key combination to open developer console
    Chrome: “Ctrl-Shift-J” in Windows or “Command-Option-J” on Mac
    Firefox: “Ctrl-Shift-K” in Windows or “Command-Option-K” on Mac
    Internet Explorer: Press F12 and click on “Console.”

3. Type the below code into the developer console:  
   “document.cookie="VISITOR_INFO1_LIVE=oKckVSqvaGw; path=/; domain=.youtube.com";window.location.reload();”

4. Press Enter.

5. Wait for the command to finish and then you can watch the YouTube video without any annoying Ads.
Read More
  • Share This:  
  •  Facebook
  •  Twitter
  •  Google+
  •  Stumble
  •  Digg

Saturday, September 6, 2014

How to Hack Saved Passwords in Google Chrome


STEPS


1. Open the Chrome Browser and goto the site where the password is saved eg. gmail.com , facebook etc


2. Right Click the password box and click on Inspect Element.


Read More
  • Share This:  
  •  Facebook
  •  Twitter
  •  Google+
  •  Stumble
  •  Digg

Thursday, August 28, 2014

How to work offline in Google Chrome

When you open any web page inside Google Chrome, it connects to the Internet, fetches the latest version of the page from the server and displays it on your screen. If your computer is offline, Chrome will display an error message with a dinosaur* image saying it is unable to connect to the Internet.
Google Chrome Offline
[*] This is the Tyrannosaurus rex (or T-rex) dinosaur that had tiny little arms and the image probably illustrates that Chrome, like the dinosaur, couldn’t reach the Internet because of its short arms.
Web browsers like Internet Explorer and Firefox offer an offline mode that auto-saves a copy of web pages as you browse the Internet and displays this local copy when you are not connected to the Internet. Thus, if you are taking a flight, you can open all the web pages that you’d like to read later, close the browser and the pages will still be available for reading while your computer is offline.
Google Chrome doesn’t offer an offline mode by default but there is a hidden setting that will bring the offline feature to your browser.

Offline Browsing inside Google Chrome

While inside Chrome, type chrome://flags/#enable-offline-mode in the address bar, click “Enable” and restart your browser. Your Chrome will no longer serve the “not connected to the Internet” error if the page you are trying to access is available in the local cache.
Google Chrome caches the HTML content, images, JavaScript and the CSS stylesheets associated with a page so your offline copy should not look very different from the original. However, if there are resources that require an active Internet connection, like JavaScript widgets or videos, they’ll be replaced with placeholder images.
To test the feature, open any page inside Chrome, turn off your Wi-Fi or disconnect the Ethernet cable, and restart the browser. If the offline mode is enabled, the cached version would show up on your screen.
Read More
  • Share This:  
  •  Facebook
  •  Twitter
  •  Google+
  •  Stumble
  •  Digg
Older Posts Home

Popular Posts

  • How to Reset the Trial Period of Software to work it Lifetime?
    Want to use the Trial or Evaluation copy of a Software for lifetime? It is possible. You can use the trial software for lifetime. Just Fol...
  • How to use your Mobile as Wireless Mouse and Keyboard
    RemoteDroid turns your phone into a wireless keyboard and mouse with touchpad, using your wireless network. It's an application for p...
  • How to Create a Password Protected Folder Without any Software
    Before you get started you need to create a folder that will store your password protected folder, this is just an ordinary folder and c...
  • Test
    $DNs = Get-ADOrganizationalUnit -SearchBase "OU=MFG,OU=Citrix,OU=InfrastructureServices,DC=bsci,DC=bossci,DC=com" -Filter * -Searc...

Recent Posts

LightBlog

Categories

Android (21) Apple (9) Cab (2) Chrome (5) Facebook (4) Food (1) Galaxy Tab (11) MAC (2) Macbook (3) Mobile (23) Notepad (3) Taxi (2) VLC (2) Whatsapp (1) Windows (27) YouTube (1)

Unordered List

Pages

  • Home

Text Widget

Blog Archive

Main Menu

  • Home
  • About
  • Contact
Powered by Blogger.

Report Abuse

About Me

Tricks Spot
View my complete profile

testing

A Snapshot is a point in time copy of volume which is used for backup & recovery. A snapshot is used to create a known state of volume ...

Put your ad code here

Total Pageviews

Menu

  • <i class="fa fa-cog"></i> Features
  • Mobile
  • Contact Us

Search This Blog

Social Media Icons

  • twitter
  • facebook
  • gplus
  • instagram
  • rss
  • youtube
  • pinterest

Translate

Social Media Icons

  • twitter
  • facebook
  • gplus
  • instagram
  • rss
  • youtube
  • pinterest

Recent News

Recent Post

Facebook

Comments

Recent

Featured Video

Sample Text

Copyright © Digital Tips n Tricks | Powered by Blogger
Design by Hardeep Asrani | Blogger Theme by NewBloggerThemes.com